| One of my favorite projects last year was a design thinking challenge where students had to design and 3D print cookie cutters for teachers in the building. Our theme for the year was empathy, and this challenge required students to create a design for a specific client, ask for feedback, and iterate on that feedback. The best part of the project was all the plates of cookies we received from happy teachers! | 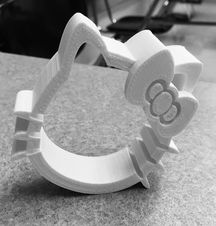 |
I sent out an email to the staff describing the project and asking them to fill out a Google Form if they would like a student to design a custom cookie cutter for them. The form asked for their:
For this project we used Autodesk's Tinkercad, a free and easy-to-use online design program. Students could either make a cutout cutter or an imprint stamper. I've included a quick video tutorial on how to make both below. For students looking to make more unique shapes, this shape generator tutorial by Kim Coyle is a great place to start.
- Name
- Location during third period (when our class met), and
- A brief description of the cookie cutter they wanted (size, shape, etc.)
For this project we used Autodesk's Tinkercad, a free and easy-to-use online design program. Students could either make a cutout cutter or an imprint stamper. I've included a quick video tutorial on how to make both below. For students looking to make more unique shapes, this shape generator tutorial by Kim Coyle is a great place to start.
Our students assigned me a client as well who just happened to be our principal. I chose to email my prototype to her and shared our communication with my students as an example of professional communication. I also made sure to alert the staff that students would be either emailing or meeting with them to discuss their prototypes. I asked staff members to offer constructive feedback about their designs before we sent them to the printer.
Instead of this being a weeklong project, students were able to work on their designs over the course of the month when they had downtime or needed a break from another project they were working on. This allowed students that were less comfortable using CAD and those whose designs required multiple iterations to have the time to complete the project without feeling pressured to rush through the design process.
After receiving final approval for their designs, students printed our their designs and gifted them to their clients . You can see some of the finished projects below. If you decide to work on this project with your students, please share you completed designs (and cookie photos) with me.